Datasets
The Datasets page is your data management hub where you can upload, organize, and share all your spatial and non-spatial data in GOAT. This centralized workspace provides an organized view of your datasets, categorized into Personal Datasets, Team Datasets, and Organization-wide Shared Datasets. Here you can:
- Add new datasets
- Filter and organize datasets for better data structure and management
- Manage datasets by sharing, moving, deleting, among others functions.
Adding datasets
You can add datasets to GOAT by:
- Uploading files from your computer
- Connecting to external data sources.
Upload data
GOAT supports multiple file formats for upload: GeoPackage, GeoJSON, Shapefile, KML, CSV, XLSX, ZIP, Parquet, and COG files.
Datasets page using the sidebar navigation.+ Add Dataset and select Dataset Upload.Next.Worksheet— For XLSX files with multiple sheets, select which sheet to import.First row is header— Toggle on (default) if your file's first row contains column names. Toggle off if the first row is data — column names will be auto-generated and you can rename them later in the layer settings.
Next when ready.- Destination Folder — Choose where to organize your dataset
- Name — Give your dataset a descriptive name
- Description (optional) — Add details about your dataset's content and purpose
Next.Upload to add the dataset to your workspace.External data sources
Connect to external data services including Web Feature Service (WFS), Web Map Service (WMS), Web Map Tile Service (WMTS), XYZ Tiles, and Cloud Optimized GeoTIFF (COG).
Datasets page using the sidebar navigation.+ Add Dataset and select Dataset External.Next.Configure your dataset:
- Destination Folder - Choose where to organize your dataset
- Name - Give your dataset a descriptive name
- Description (optional) - Add details about the external data source
Save to add the external dataset.You can also upload datasets directly while working in the Map interface for immediate use in your projects.
Filtering and organizing datasets
Filter by Dataset Type
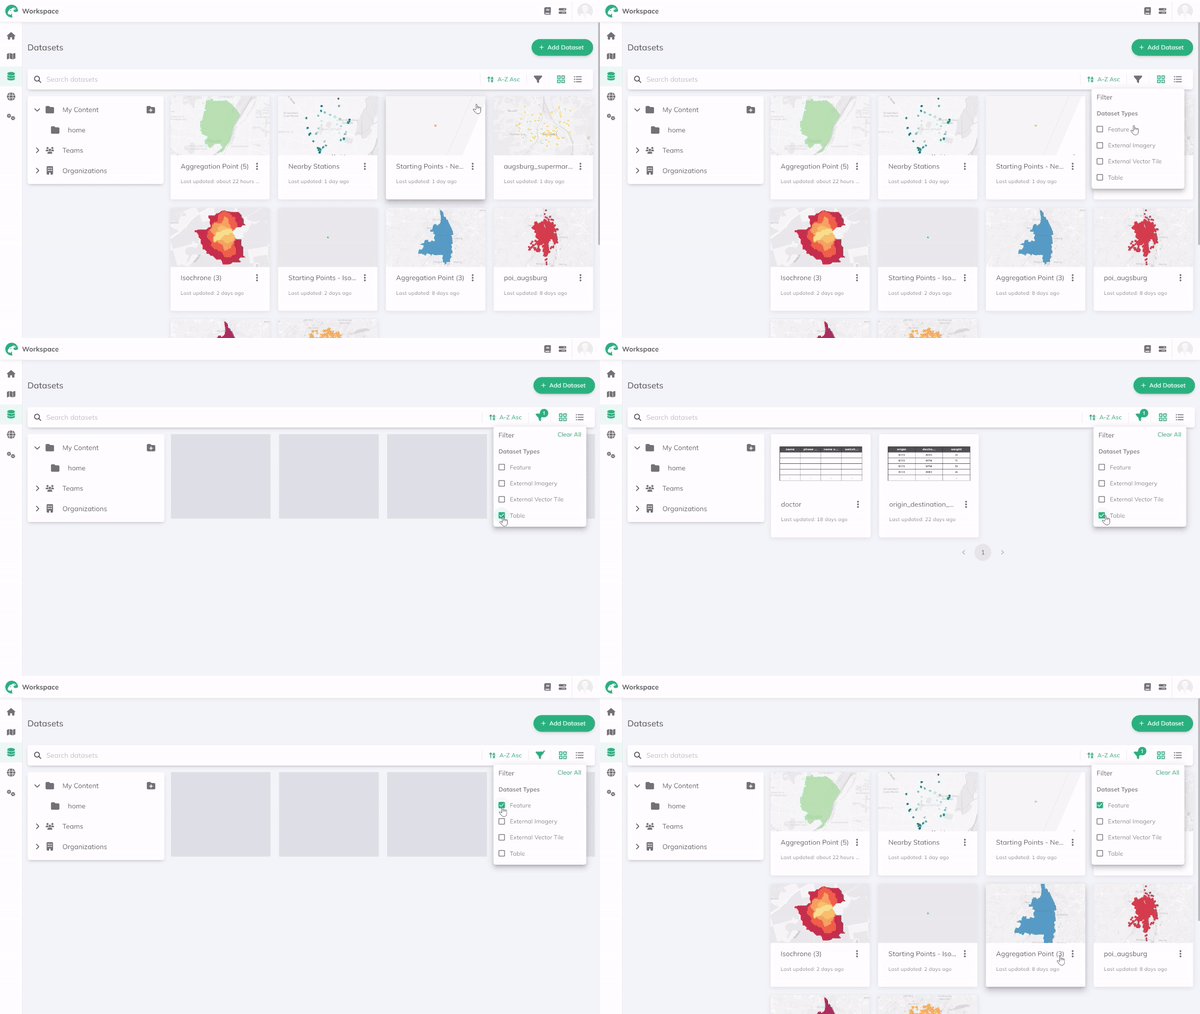
Easily filter your datasets by dataset type to find exactly what you need. Available filters include:
- Features - Spatial datasets with points, lines, or polygons
- Tables - Non-spatial tabular data
- External Imagery - Raster data from external sources
- External Vector Tiles - Vector tiles from external services
Click the filter icon  to select your desired dataset type.
Create and manage folders
Organize your datasets into folders for better structure and easier navigation.
To create a new folder:
 folder icon.
Create to finalize the folder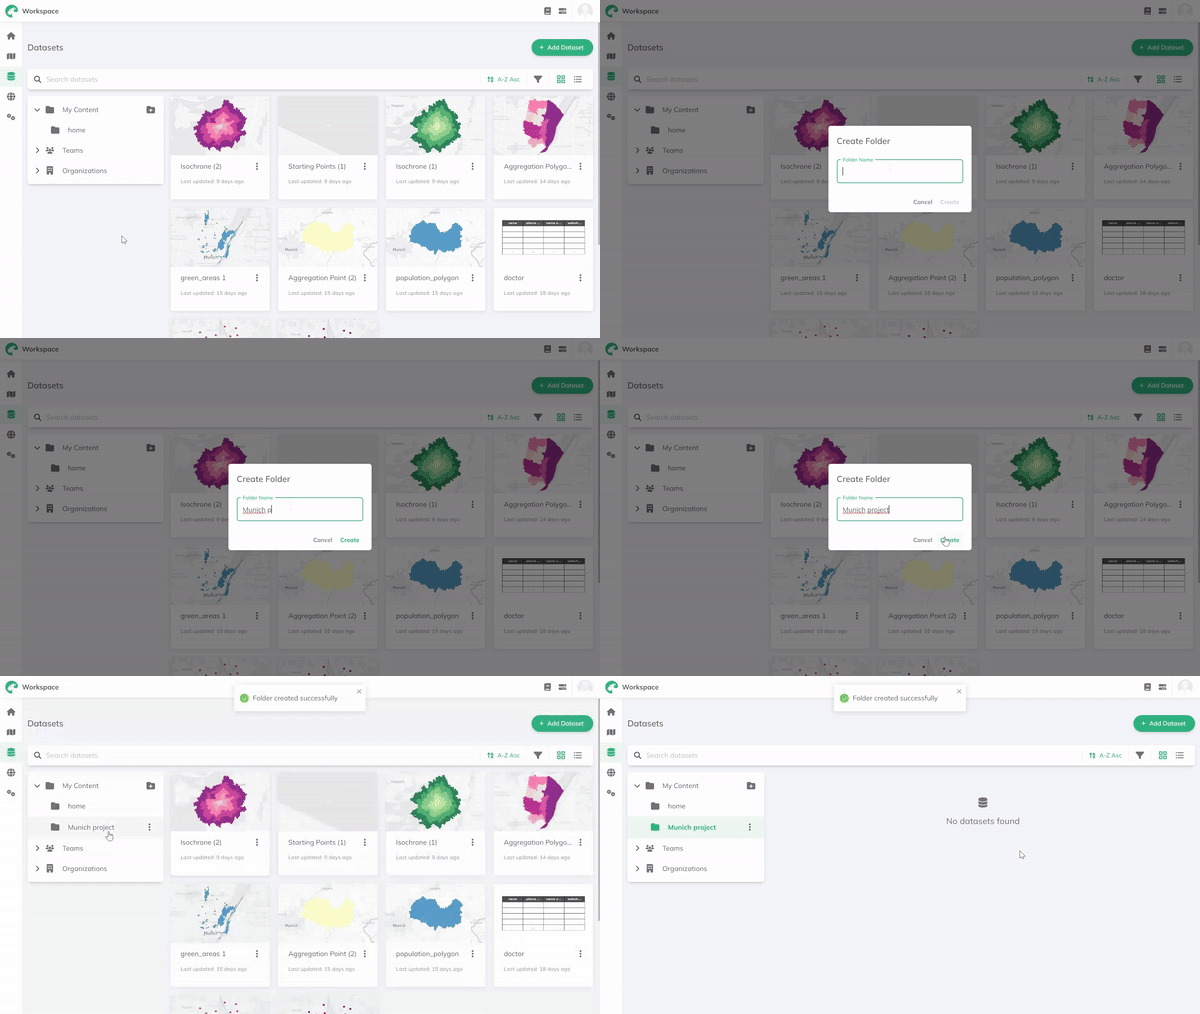
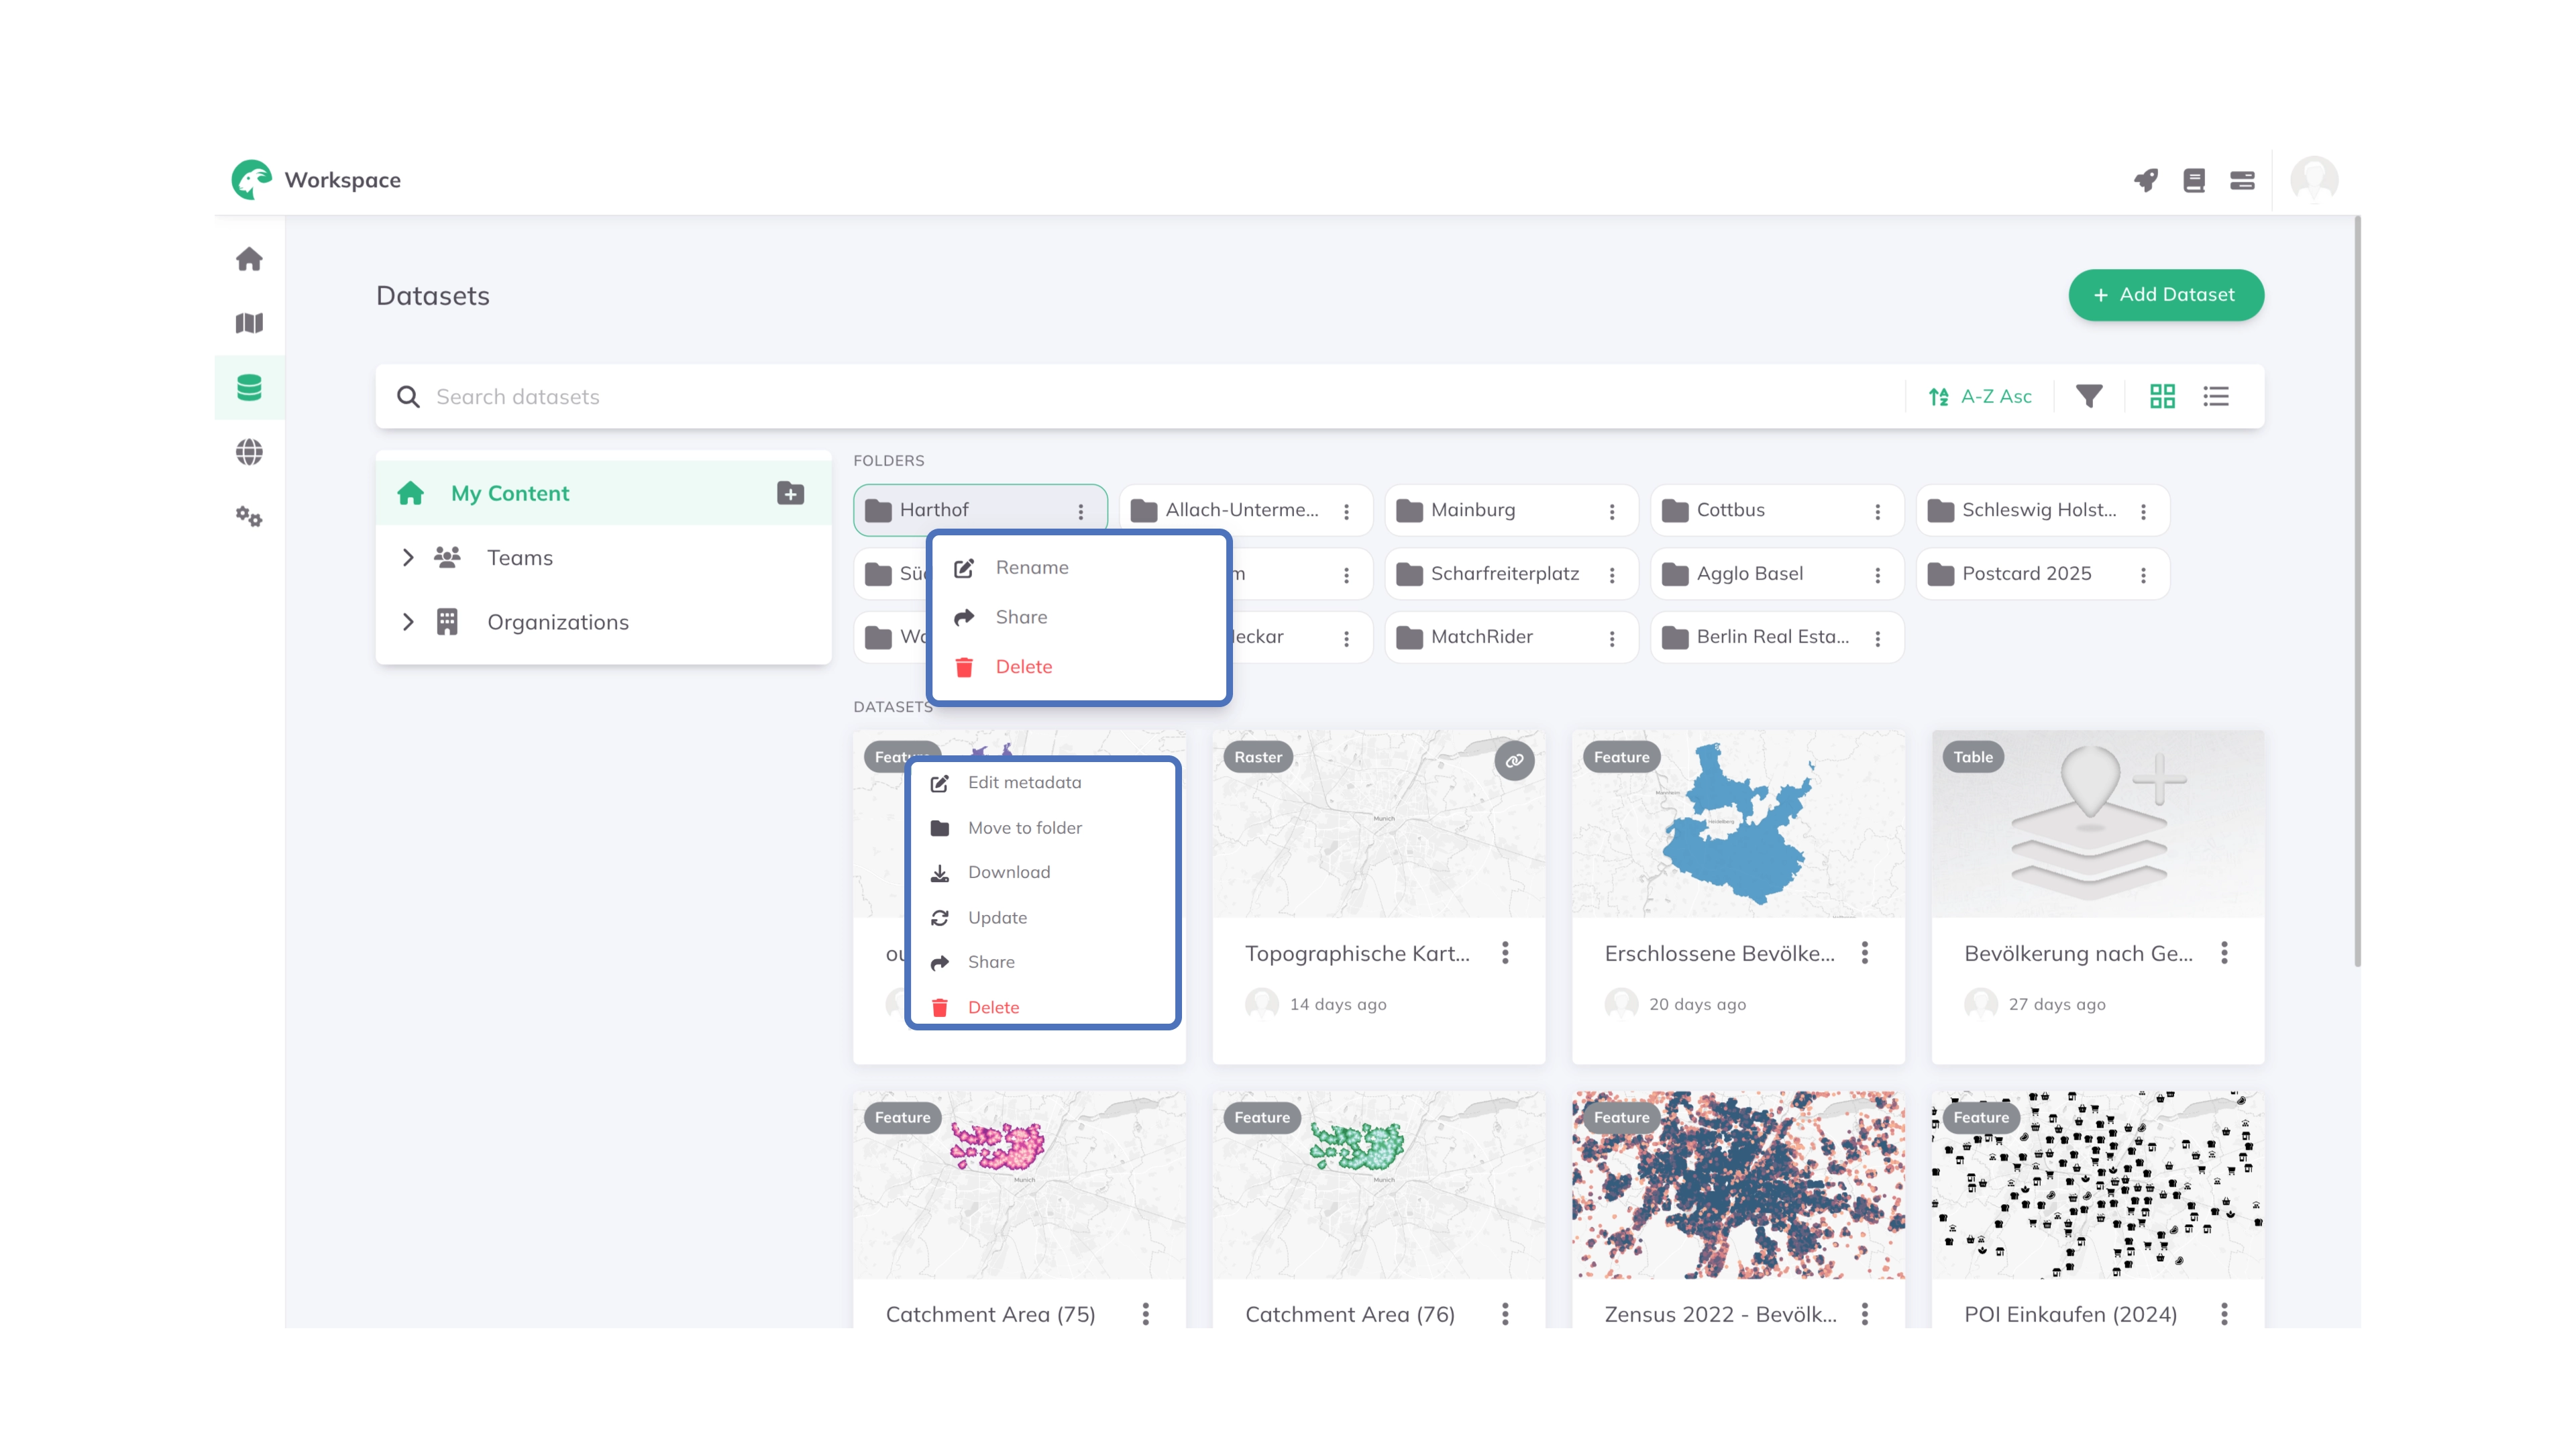
To rename, share, or delete a folder:
Click the 
More Options icon next to any folder:
Rename— Change the folder nameShare— Open the Manage access dialog with two tabs: Organization (share with your entire organization) and Teams (share with specific teams). These are mutually exclusive — granting access to the organization clears any team grants, and vice versa. For each entry, set the access level to Editor (can edit) or Viewer (read-only), or No Access to revoke. ClickSaveto apply. All datasets inside a shared folder automatically inherit the folder's access — inherited access is shown asVia folderin those items' own share dialogs and cannot be changed there directly.Delete— Remove the folder
To move datasets to folders:
more options button next to your datasetMove to folder from the menuMove.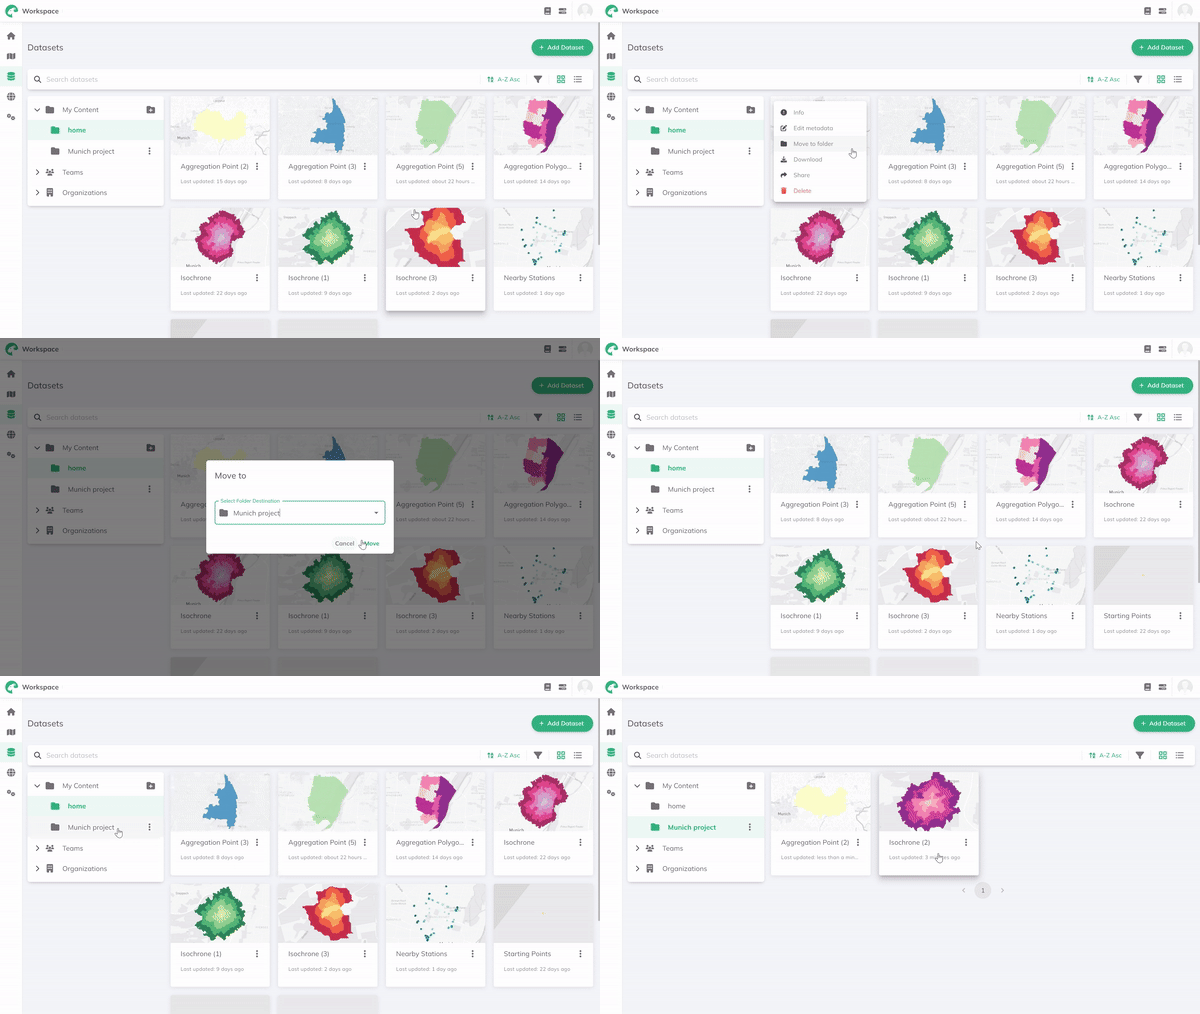
Dataset management
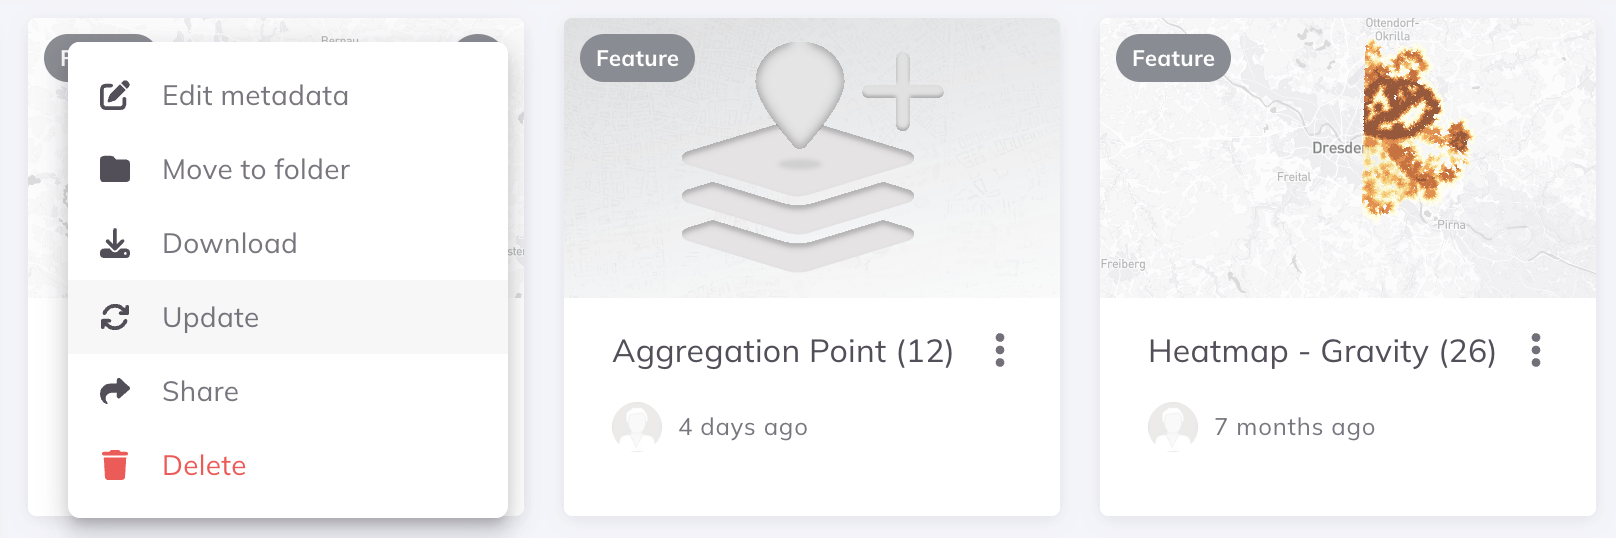
Access comprehensive dataset management options through the More Options menu next to each dataset. Available actions include:
Edit metadata- Access and edit dataset metadataMove to folder- Reorganize your dataset locationDownload- Export datasets to your local deviceUpdate- Update datasets with new dataShare- Collaborate by sharing datasets with team members or your organizationDelete- Remove datasets you no longer need
Downloading datasets
When downloading a spatial dataset, a dialog lets you choose:
- Download Type — the export file format (e.g. GeoPackage, GeoJSON, Shapefile).
- Coordinate Reference System (CRS) — the CRS to reproject the data into before download. GOAT automatically suggests CRS options based on the dataset's geographic extent: global options (WGS 84, Web Mercator) are always available, plus the matching UTM zone and any relevant national or regional CRS. The default is WGS 84 (EPSG:4326).
Dataset metadata and preview
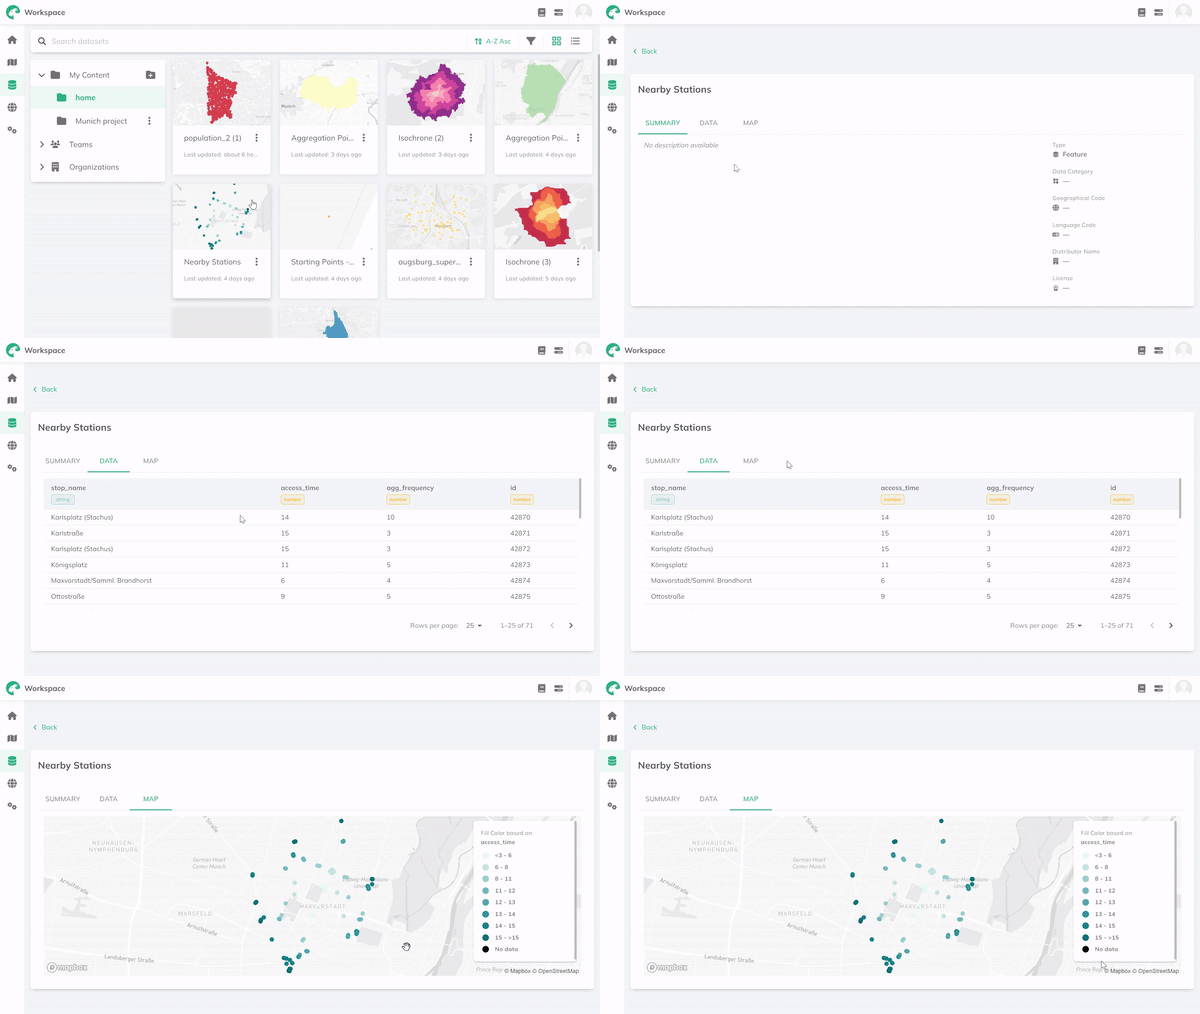
View detailed information about your datasets to better understand their content and structure. Access metadata by clicking directly on the dataset name.
The metadata view provides:
Summary- Overview of dataset properties and statisticsData- Detailed view of all data fields and valuesMap- Spatial visualization with interactive legend