Layers
In the Layers section, layers can be added and organized. Among others, the layer order can be adjusted, layers can be enabled/disabled, duplicated, renamed, downloaded, and removed.
How to manage your Layers
The Layers Panel is your central hub for organizing and controlling all the data in your GOAT project. Here you can add new datasets, arrange layer order for optimal visualization, group related layers together, and control visibility.

Add Layers
You can add layers from different sources to your map. You can either:
- Integrate datasets from your data explorer or the catalog explorer
- Upload new datasets from your local device (GeoPackage, GeoJSON, Shapefile, KML, CSV, or XLSX).
- Add external layers by inserting the url of the external source (WFS, WMS, WMTS, XYZ Tiles, or COG).
- Create a new empty layer directly in your project.
+ Add Layer to open the layer options. Dataset Explorer, Dataset Upload, Dataset External, Catalog Explorer, or Create Layer to choose your data source.- Dataset Explorer
- Dataset Upload
- Dataset External
- Catalog Explorer
- Create Layer
+ Add Layer to add the selected file.Upload to upload the dataset.external URL and follow the steps depending on the type of dataset you would like to add.- WFS
- WMS
- WMTS
When you would like to add a WFS layer you need to have a GetCapabilities link.
In the next step you can choose which layer you would like to add to your dataset. You can only choose one layer at a time.When you would like to add a WMS layer you need to have a GetCapabilities link.
Here you have the option to select multiple layers, but when added to GOAT it will be merged onto one layer.You can add a WMTS to your dataset via a direct URL or GetCapabilities link. You can only choose *one layer* at a time if your URL contains more than one layer.
The projection needs to be WEB Mercator (EPSG:3857) and GoogleMaps compatible. Because they have different zoom levels, the dataset would not show up in the list of available layers if it doesn't meet both requirements.GOAT Dataset Catalog to explore available datasets.+ Add Layer to add the selected dataset.Point, Line, Polygon, or Table), and define your fields. For full details, see Layer Editing.You can manage all your datasets on the Datasets page.
Order Layers
When visualizing several data sets at once, the layer order is crucial for creating clear, readable maps. Therefore, the layer order can be changed interactively.
Click on the layer you want to move, then drag and drop the layer to your desired position.Show / Hide Layers
Click the  icon next to the layer name to temporarily hide a layer from the map view. Clicking the eye again will make the layer visible again.
Group Layers
Click the 
Group Layers button on top of the Layers Panel to create layer groups that help organize related datasets together.
Group Layers button at the top of the Layers Panel.Create to create the new layer group.Layer Options
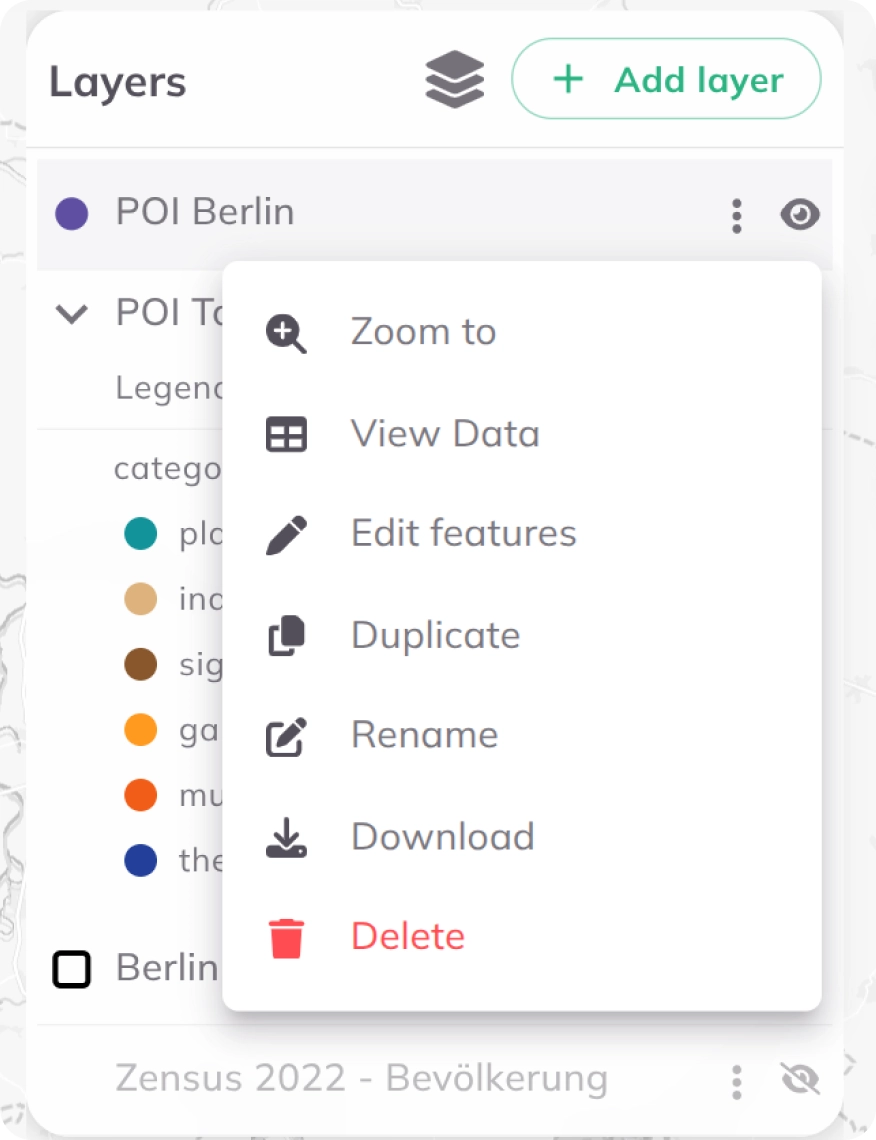
By clicking on 
more options icon next to each layer you have further options to manage and organize the selected layer.
Want to change the design of your layers? See Layer Style.
Only want to visualize parts of your dataset? See Filter.
Edit Features
Use Edit features from the layer's more options menu to update feature data directly on the map.
Edit features in the layer options to start editing mode.Feature attributes panel.Done to confirm the feature edit.Save to apply all pending changes, or Discard to cancel them.