Labels
Labels allow you to display text on your map features based on any attribute field. This makes your maps more informative and easier to interpret by showing key information directly on the features.
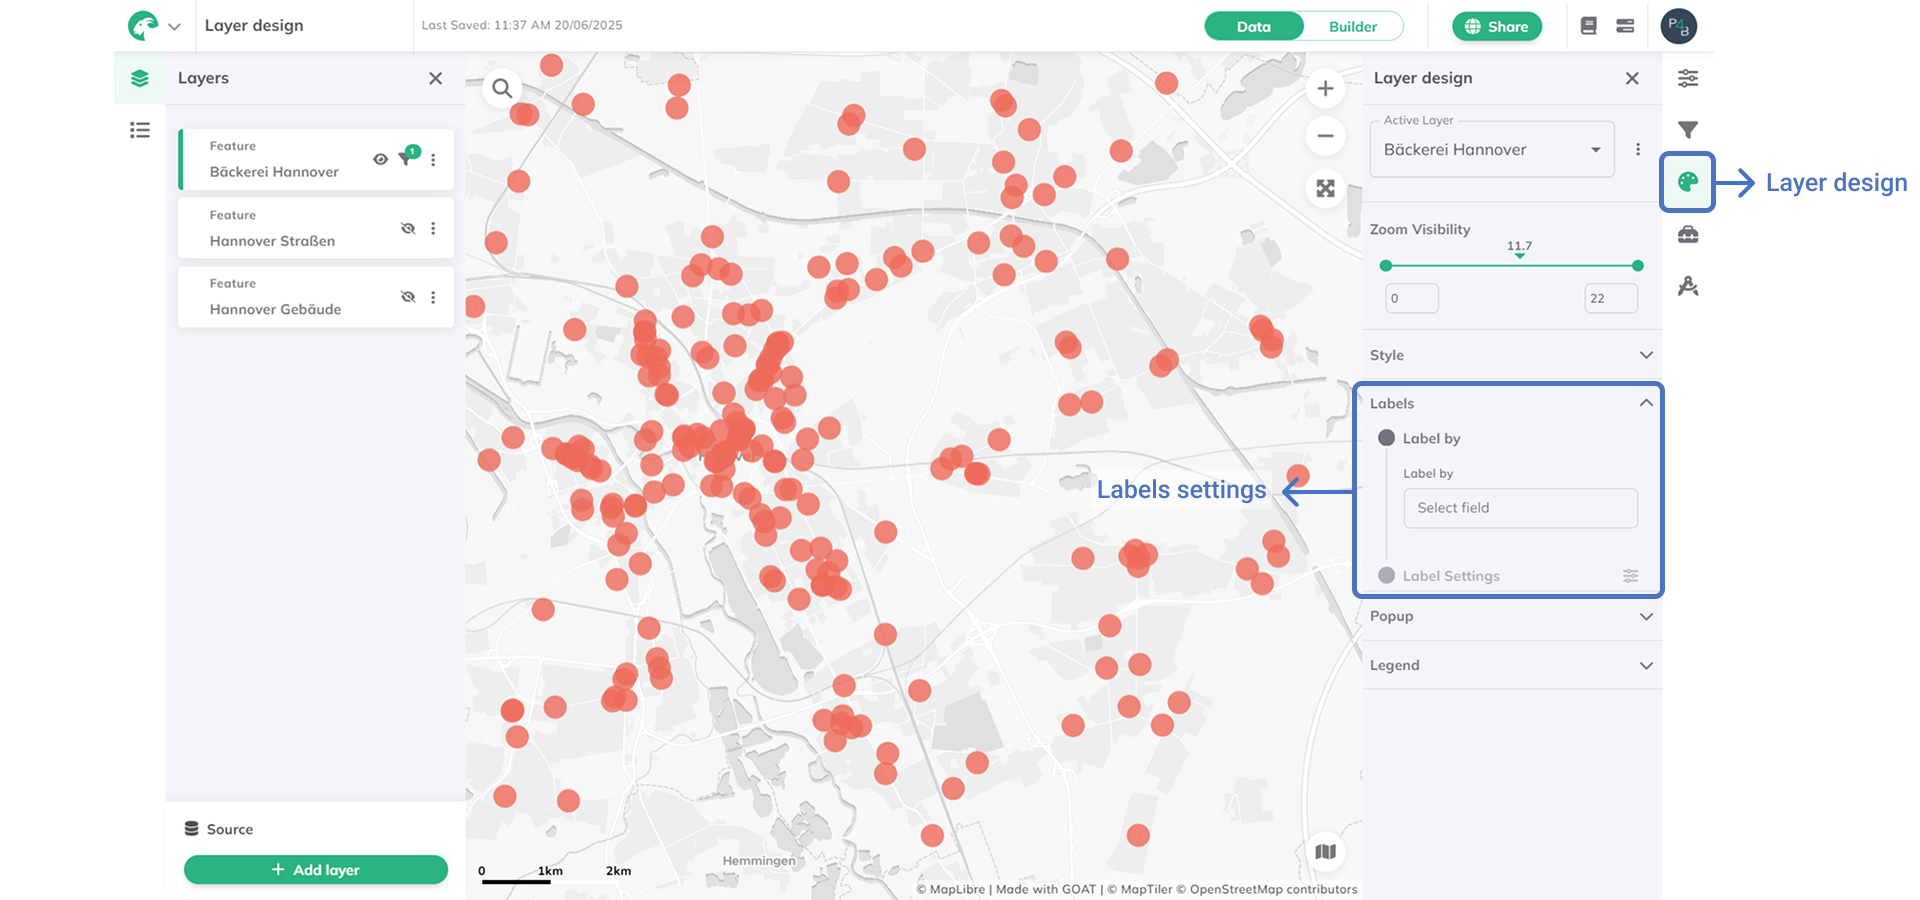
How to add and configure labels
General settings
1
Select your layer and navigate to  and find the
Layer design and find the Labels section2
On
Label by choose the attribute field whose values you want to display as labels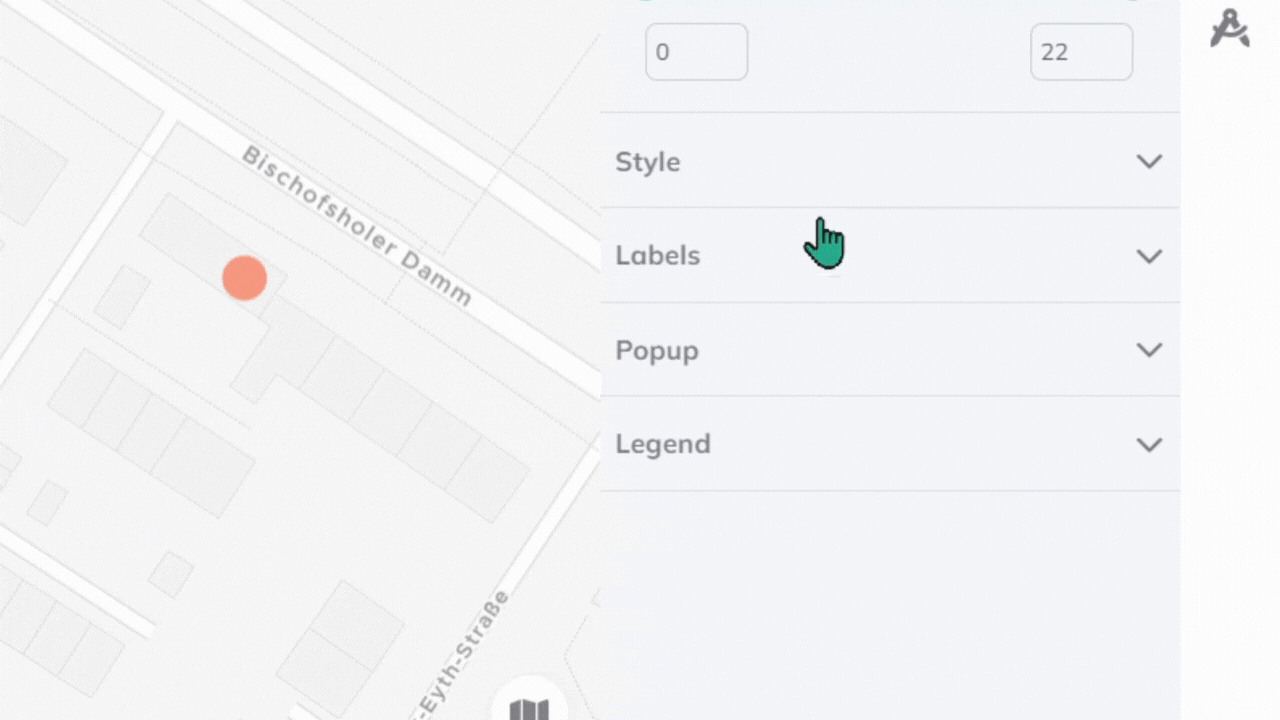
3
On
Size, set the label size using the slider (5-100) or enter the value manually4
On
Color choose a label color using the color picker or select from preset colors5
Set the
Placement to define where labels appear relative to features (center, top, bottom, left, right, or corner positions)Advanced settings
6
Click the  button to access additional options
Advanced settings button to access additional options7
Adjust
Offset X and Offset Y to fine-tune label position by moving horizontally or vertically8
Configure
Allow overlap: Enable to show all labels (may cause visual clutter) or Disable for automatic clustering at lower zoom levels (cleaner appearance)9
Add a
Halo color to create a colored outline around text for better readability on busy backgrounds10
Set the
Halo width to control outline thickness (maximum is one-quarter of font size)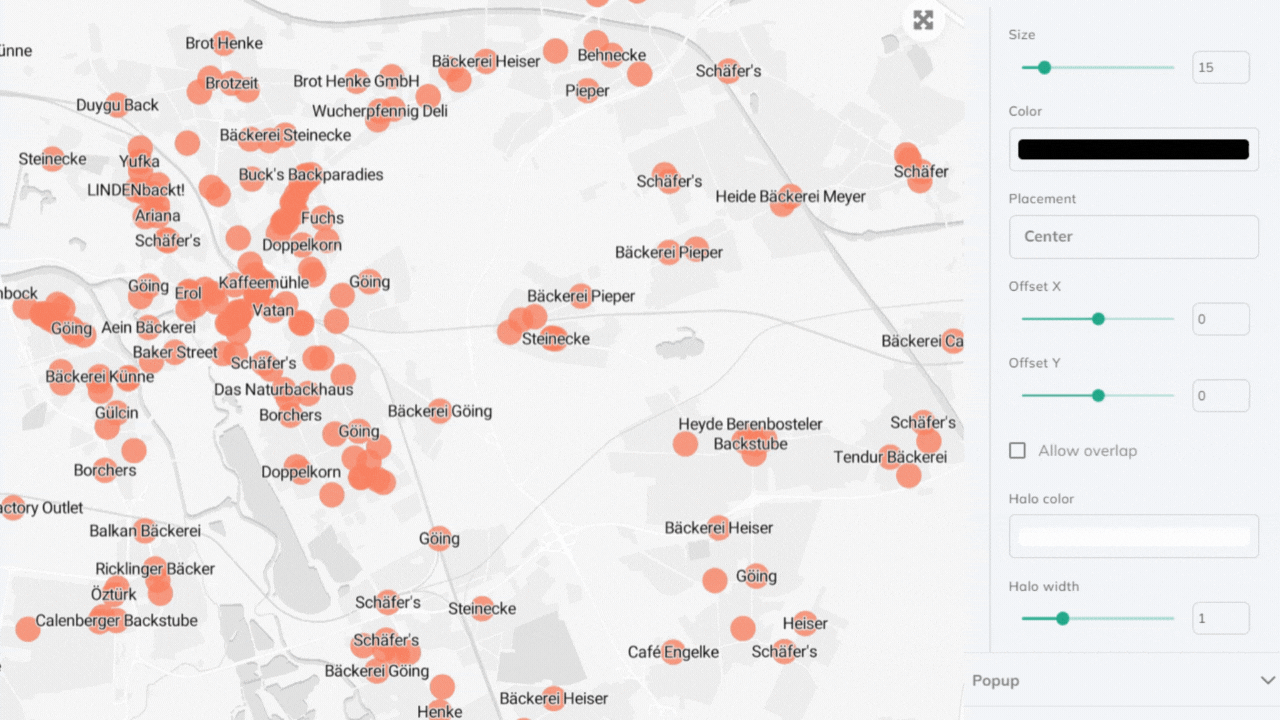
Best practices
- Use smaller fonts for dense layers to reduce visual clutter
- Add halos with contrasting colors (light halos on dark maps, dark halos on light maps) to improve text readability
- Keep overlap disabled by default for cleaner appearance, though some labels may be hidden in crowded areas
- Test your label settings at different zoom levels to ensure they remain readable and useful across all scales