Quickstart Guide
Welcome to GOAT! This quickstart guide will help you get up and running with GOAT in no time. Follow these simple steps to explore the workspace, and create your first analysis and interactive map.
Create a new project
Workspace page. Click on the + button to create a new project.Create button.
Add data to your project
You've landed in the map view of your new project. Now it's time to add some data.
+ Add Layer on the bottom left of the left panel. - Dataset Explorer
- Dataset Upload
- Catalog Explorer
- Dataset External
+ Add Layer.Upload.+ Add Layer.- WFS
- WMS
- WMTS
When you would like to add a WFS layer you need to have a "GetCapabilities" link.
In the next step you can choose which layer you would like to add to your dataset. You can only choose one layer at a time.When you would like to add a WMS layer you need to have a "GetCapabilities" link.
Here you have the option to select multiple layers, but when added to GOAT it will be merged onto one layer.You can add a WMTS to your dataset via a direct URL or "GetCapabilities" link. You can only choose one layer at a time if your URL contains more than one layer.
The projection needs to be WEB Mercator (EPSG:3857) and GoogleMaps compatible. Because they have different zoom levels, the dataset would not show up in the list of available layers if it doesn't meet both requirements.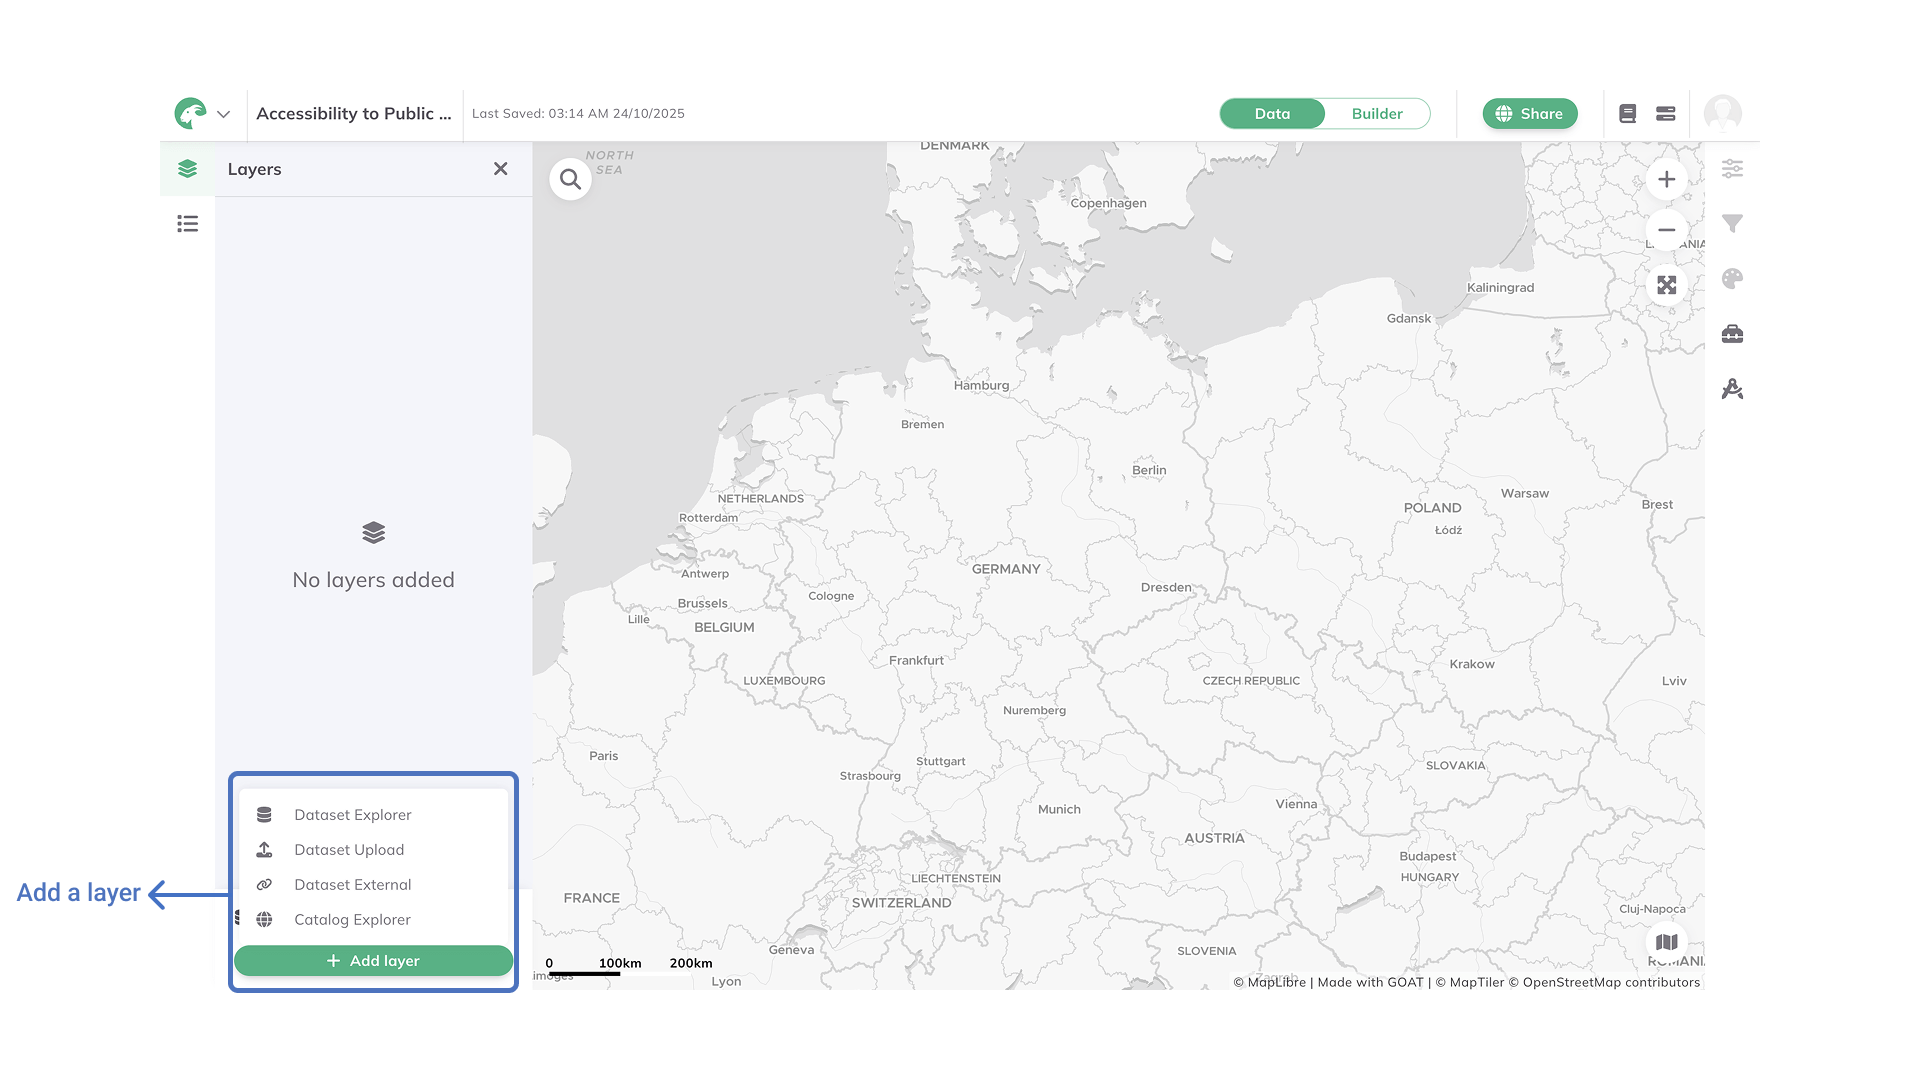
Explore the analysis tools
Depending on the layers you have added, you can run different analysis from the toolbox.
Toolbox button on the right panel.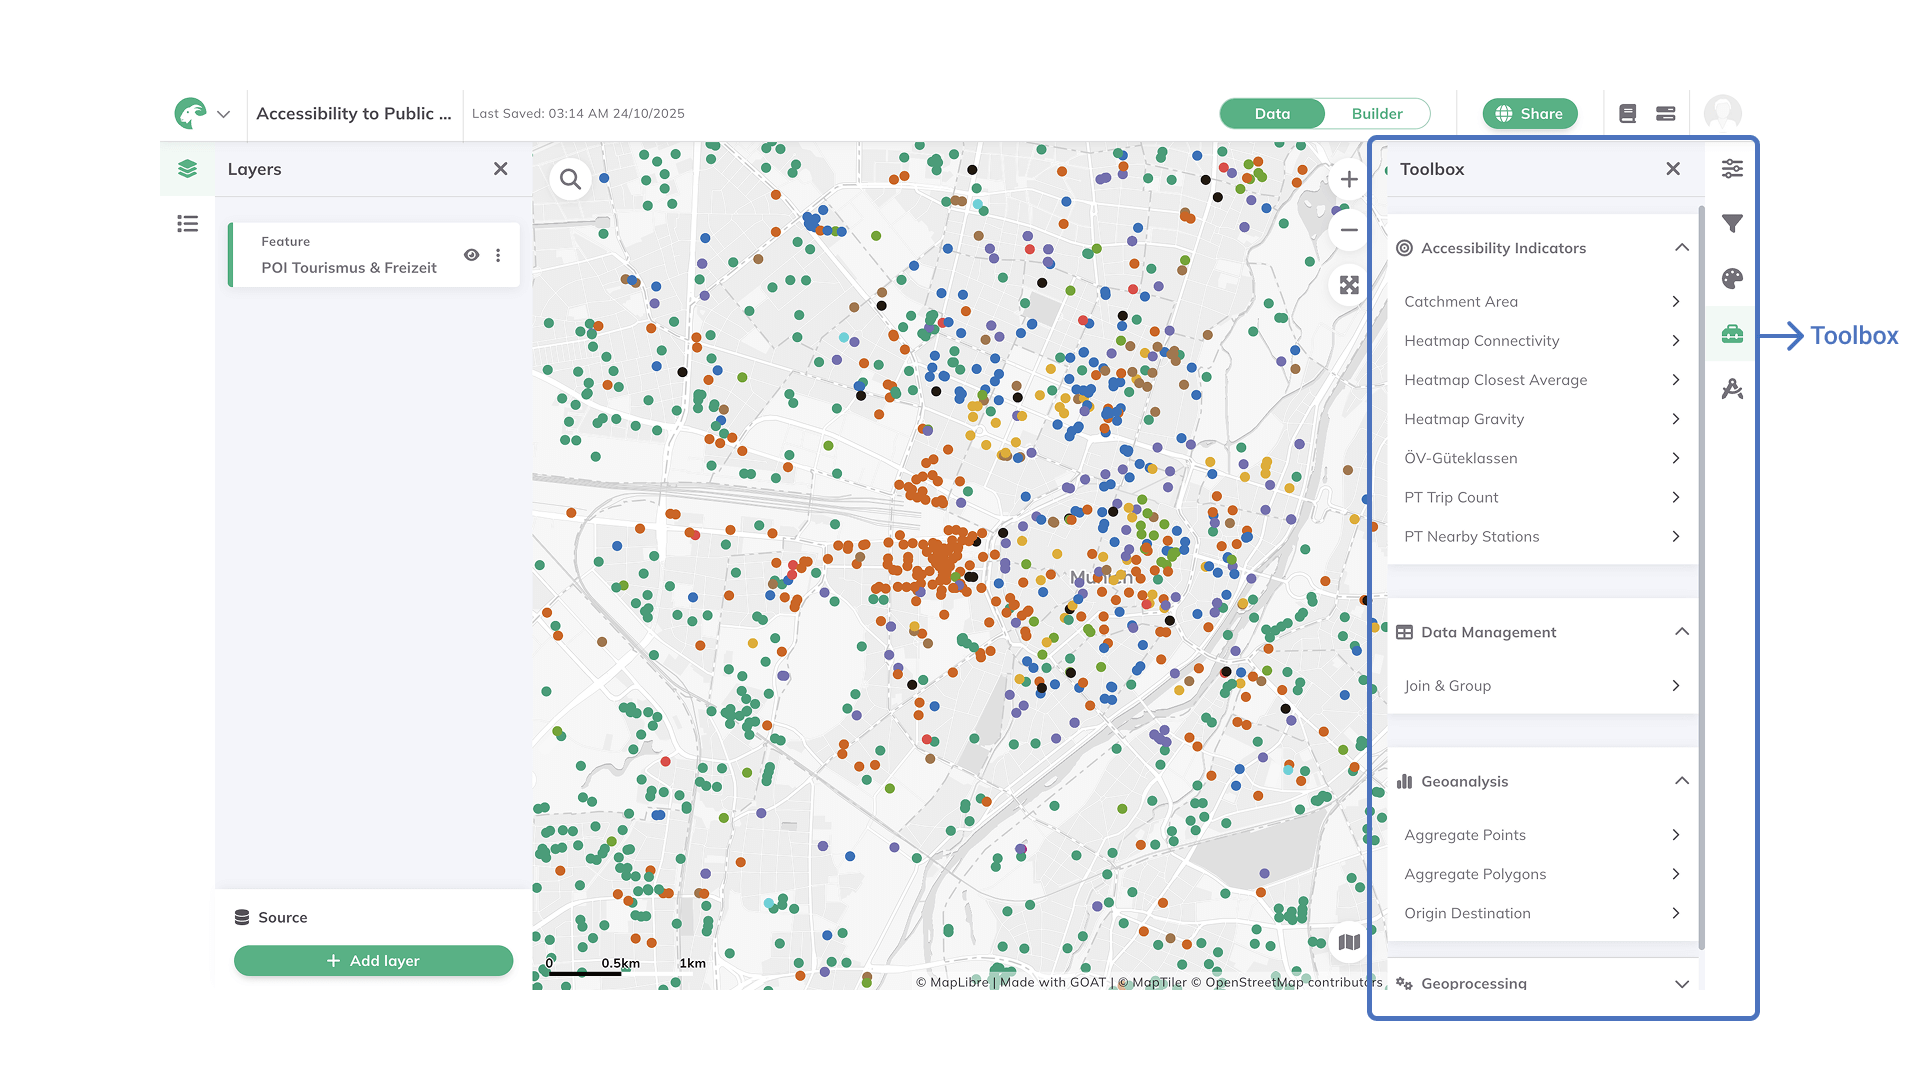
Style your map
Once you have added the layers to your map and computed the analysis, you can customize their appearance to enhance visualization.
Layer design 
, open the Style menu, select the color you want or if you want to style by attribute, click on options , and set the field you want on the Color based on menu.Style by choosing the color palette, the Stroke Color, or choosing a Custom Marker if you are working with a point layer.Labels if you want, edit your Popups and Legend.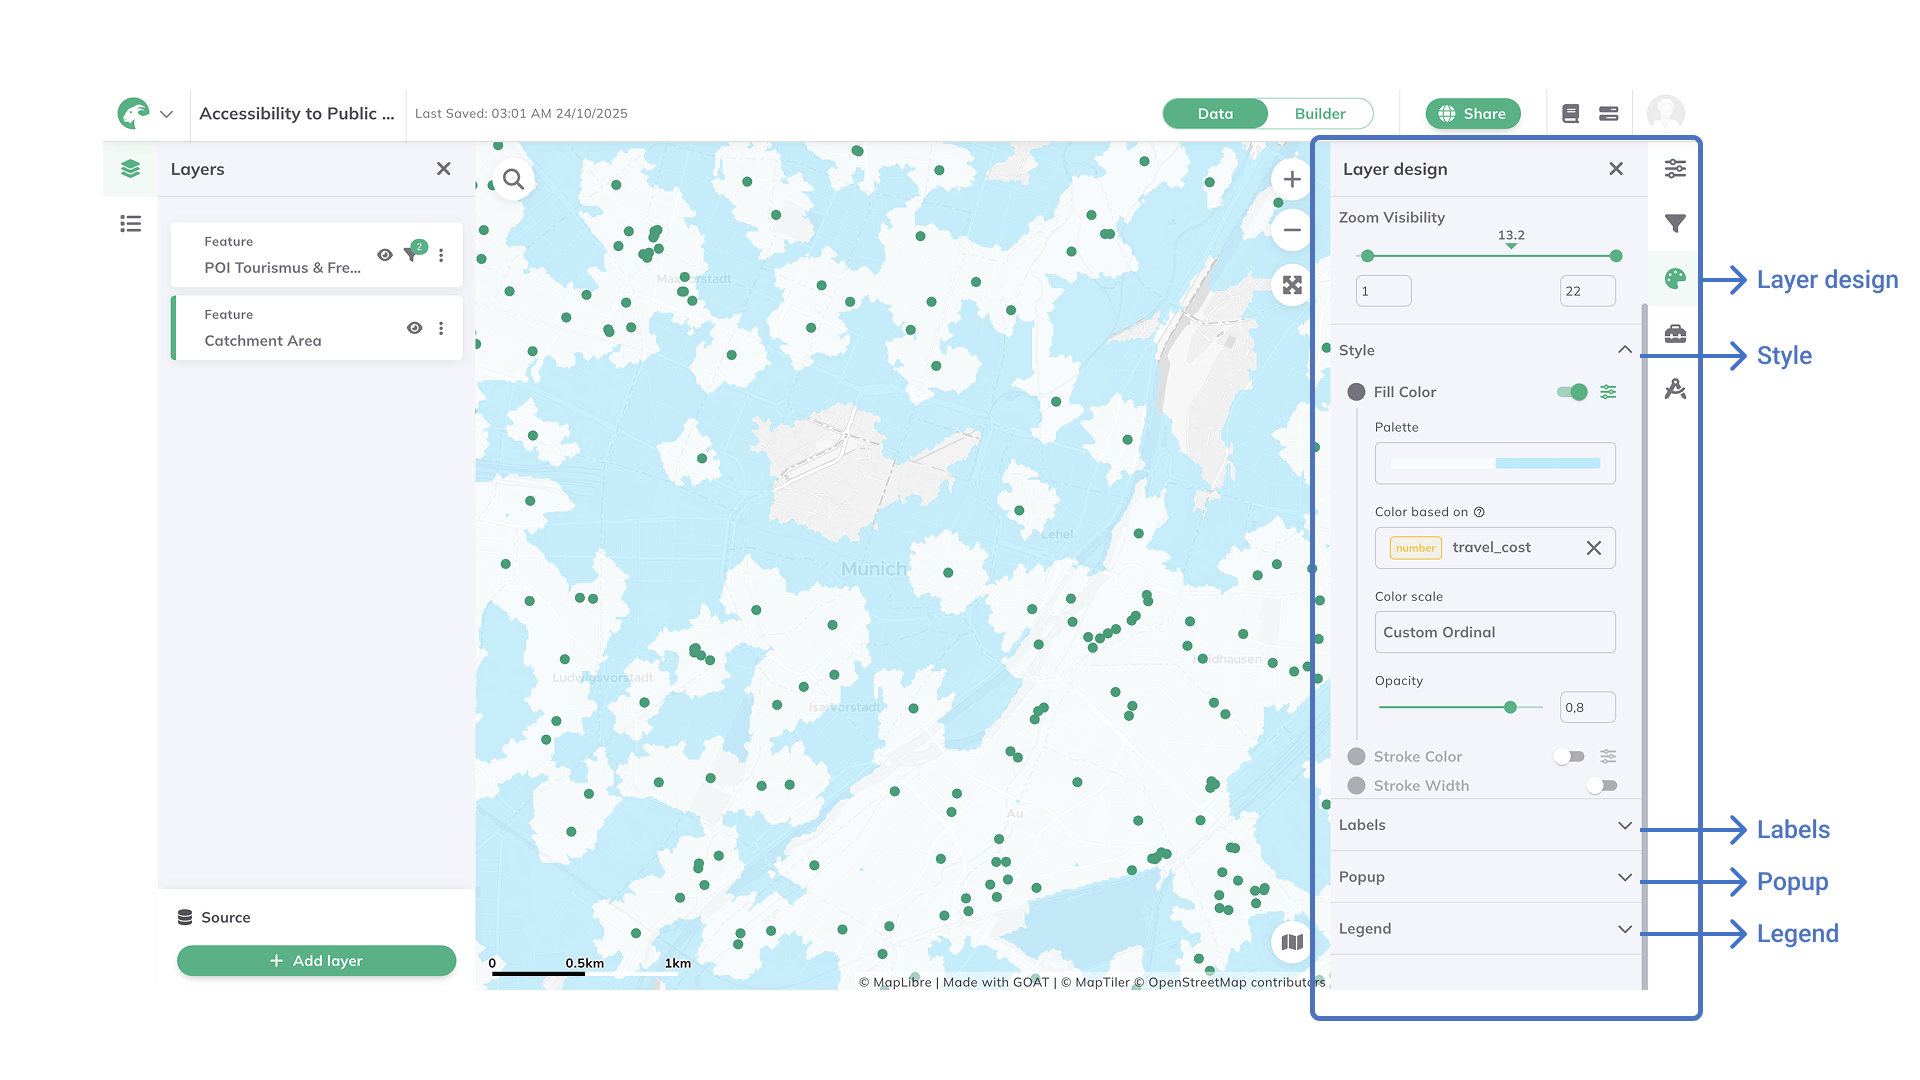
Ready to share your work
Now that you have created your first project in GOAT, it's time to share it with others. You can easily share your project by generating a shareable link or inviting collaborators to work on the project with you.
Share in the upper-right corner of the map.Public toggle and click on Publish to make your map public.Copy URL and share the direct link so others can open the map in their browser. Or click on Copy iframe Code and embed the map in websites or tools that support HTML and iframes.